Spring Has Sprung

Ever since we moved last summer, I’ve been dying to have a garden again. Our lettuce table didn’t make the move (I’m still not sure why. And I’m still waiting on my replacement…ahem, PETER) so I have been without home grown veggies for too many months.

Now, finally after many weeks of building, stucco, planning, redoing, planting and fertilizing – the garden is growing! And it looks amazing. Every time I catch a glimpse of this space, it makes me so happy.

While this is not the true true before, it’s enough of a before for this post. Imagine no stucco and very 1970’s ugly brown cement block…

My helper was not excited for the camera. He was ready to work. And by work, I mean move dirt from one side to the other.

IMG_4238

Aaaaannnddd the after!!

IMG_9206

There are four new roses – three gifts from my mom – she hand picked not only the color but the scent. I’m so excited for the blooms. One is a Pope John Paul II white rose and the one at the nursery was amazing.

IMG_9210IMG_9212

See that little pod under the bloom? It’s a Praying Mantis pod. I’m hoping they hatch and keep the aphids away…we’ll see if it works.

IMG_9209

I’m a little obsessed with the obelisk. If you need one, I got these at A Rustic Garden. Good prices and fast shipping. They are making a happy home for two kinds of grape tomatoes including Sweet 100’s – my favorites. There’s also Swiss Chard and mixed greens lettuce coming up. IMG_9207

IMG_9208

IMG_9211

I honestly forget how much I love Orange Blossoms. Every year, the first sniff of their scent reminds me – and it’s the most welcome memory. We will have Arizona Sweet and Valencia oranges this Thanksgiving. There’s also a small Meyer Lemon in the raised beds that will provide some shade in the summer.

IMG_9214

One of the lone survivors of our backyard re-landscaping was this Pomegranate tree. It was a bit neglected, but after a good trim and lots of fertilizer, it’s full of blooms. And hopefully lots of fruit too.

IMG_9216

Spring has Sprung

Ever since we moved last summer, I’ve been dying to have a garden again. Our lettuce table didn’t make the move (I’m still not sure why. And I’m still waiting on my replacement…ahem, PETER) so I have been without home grown veggies for too many months.

Now, finally after many weeks of building, stucco, planning, redoing, planting and fertilizing – the garden is growing! And it looks amazing. Every time I catch a glimpse of this space, it makes me so happy.

While this is not the true true before, it’s enough of a before for this post. Imagine no stucco and very 1970’s ugly brown cement block…

My helper was not excited for the camera. He was ready to work. And by work, I mean move dirt from one side to the other.

IMG_4238

Aaaaannnddd the after!!

IMG_9206

There are four new roses – three gifts from my mom – she hand picked not only the color but the scent. I’m so excited for the blooms. One is a Pope John Paul II white rose and the one at the nursery was amazing.

IMG_9210IMG_9212

See that little pod under the bloom? It’s a Praying Mantis pod. I’m hoping they hatch and keep the aphids away…we’ll see if it works.

IMG_9209

I’m a little obsessed with the obelisk. If you need one, I got these at A Rustic Garden. Good prices and fast shipping. They are making a happy home for two kinds of grape tomatoes including Sweet 100’s – my favorites. There’s also Swiss Chard and mixed greens lettuce coming up. IMG_9207

IMG_9208

IMG_9211

I honestly forget how much I love Orange Blossoms. Every year, the first sniff of their scent reminds me – and it’s the most welcome memory. We will have Arizona Sweet and Valencia oranges this Thanksgiving. There’s also a small Meyer Lemon in the raised beds that will provide some shade in the summer.

IMG_9214

One of the lone survivors of our backyard re-landscaping was this Pomegranate tree. It was a bit neglected, but after a good trim and lots of fertilizer, it’s full of blooms. And hopefully lots of fruit too.

IMG_9216

Home Grown Tomatoes

My delicious Black Cherry tomato plant got whacked by the hard freeze in January. I had it covered, but apparently without a heater, a warm quilt was no match for the three day cold snap. I sadly watched the first morning of the freeze as all the leaves on our plants took on a purple tint – a sure sign they were done.

I couldn’t find another Black Cherry, but I did find a Sweet Millions and another cherry variety at my favorite nursery. I wish I had a time lapse camera because these things grew over night. In 8 weeks, they went from seedlings to producing handfuls of fruit! And they are good. Really good. Like I don’t get any inside because I eat them as I water plants good. And our strawberries are going bonkers – it’s a good time to be hungry in the yard.

Cherries

IMG_4897Sweet Millions not quite ready yet

IMG_4902

I’m giving the roses credit for bringing the bees for the tomatoes

IMG_4903

Delicious strawberries

IMG_4901

Patio Living

Nine months of the year, our living space grows by several hundred square feet. We have a huge back patio and almost every room in our house has a door to the outside. This time of year they are rarely closed and life seems to just move outdoors. We eat dinner on the patio, play in the grass, pick lettuce to eat and even watch whatever game is on (I learned long ago that in March, there will be either basketball or baseball on our TV. Trying to change it is futile. So I joined) thanks to PW’s handy work converting an old armoire into an outdoor TV home. It was too pretty not to snap a few pictures this weekend.

In about a week, I’m going to have a whole bush full of these little beauties!

IMG_4815

My new kumquat tree

IMG_4814

I love the way lavender smells – this one under the kumquot looks distinctly Tuscan

IMG_4813

IMG_4811

The ocotillo loved all the rain. It’s finally getting it’s leaves back and it will have blooms in a few weeks

IMG_4821

IMG_4820

The prettiest thing in the yard…he was mid sentence when I snapped this one

IMG_4819

Lettuce and herbs

IMG_4798

Sprinkler time already!?

IMG_4817

Weekend Work

Baylor and I did a lot of yard work this weekend. Her contributions are along the lines of:

1. Don’t pull the plants out that have just been planted

2. Play in a big bucket of water

3. Water the plants. The house. The patio. And herself.

But we did get a lot new color in that will hopefully last at least until it’s 110!

Beautiful Salvia and Portulaca – a favorite!

I love that you never know what color the flowers will be


Finally getting bigger berries – these are aaalllmoosst ready!

Fresh Pressed and It Feels So Good

I wanted to take a minute and say thank you. Thank you for my friends and family who  faithfully click the link to The Goon Room despite already getting the posts in email form just to boost the number of hits. Thank you for Word Press choosing to feature TGR on Fresh Pressed and thank you to all the new readers who have subscribed. Lastly, thank you for all the wonderful comments. I hope to bring a little laugh to your days for many years to come!

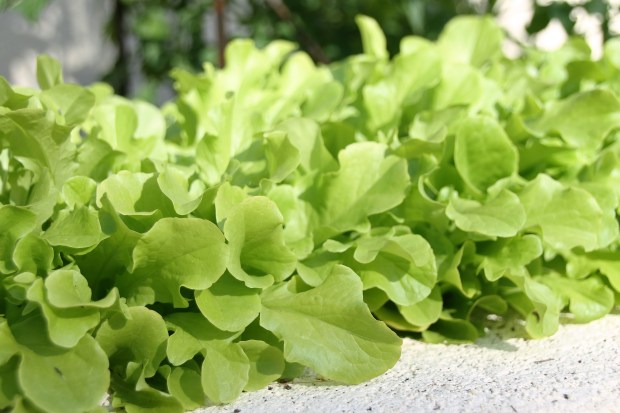
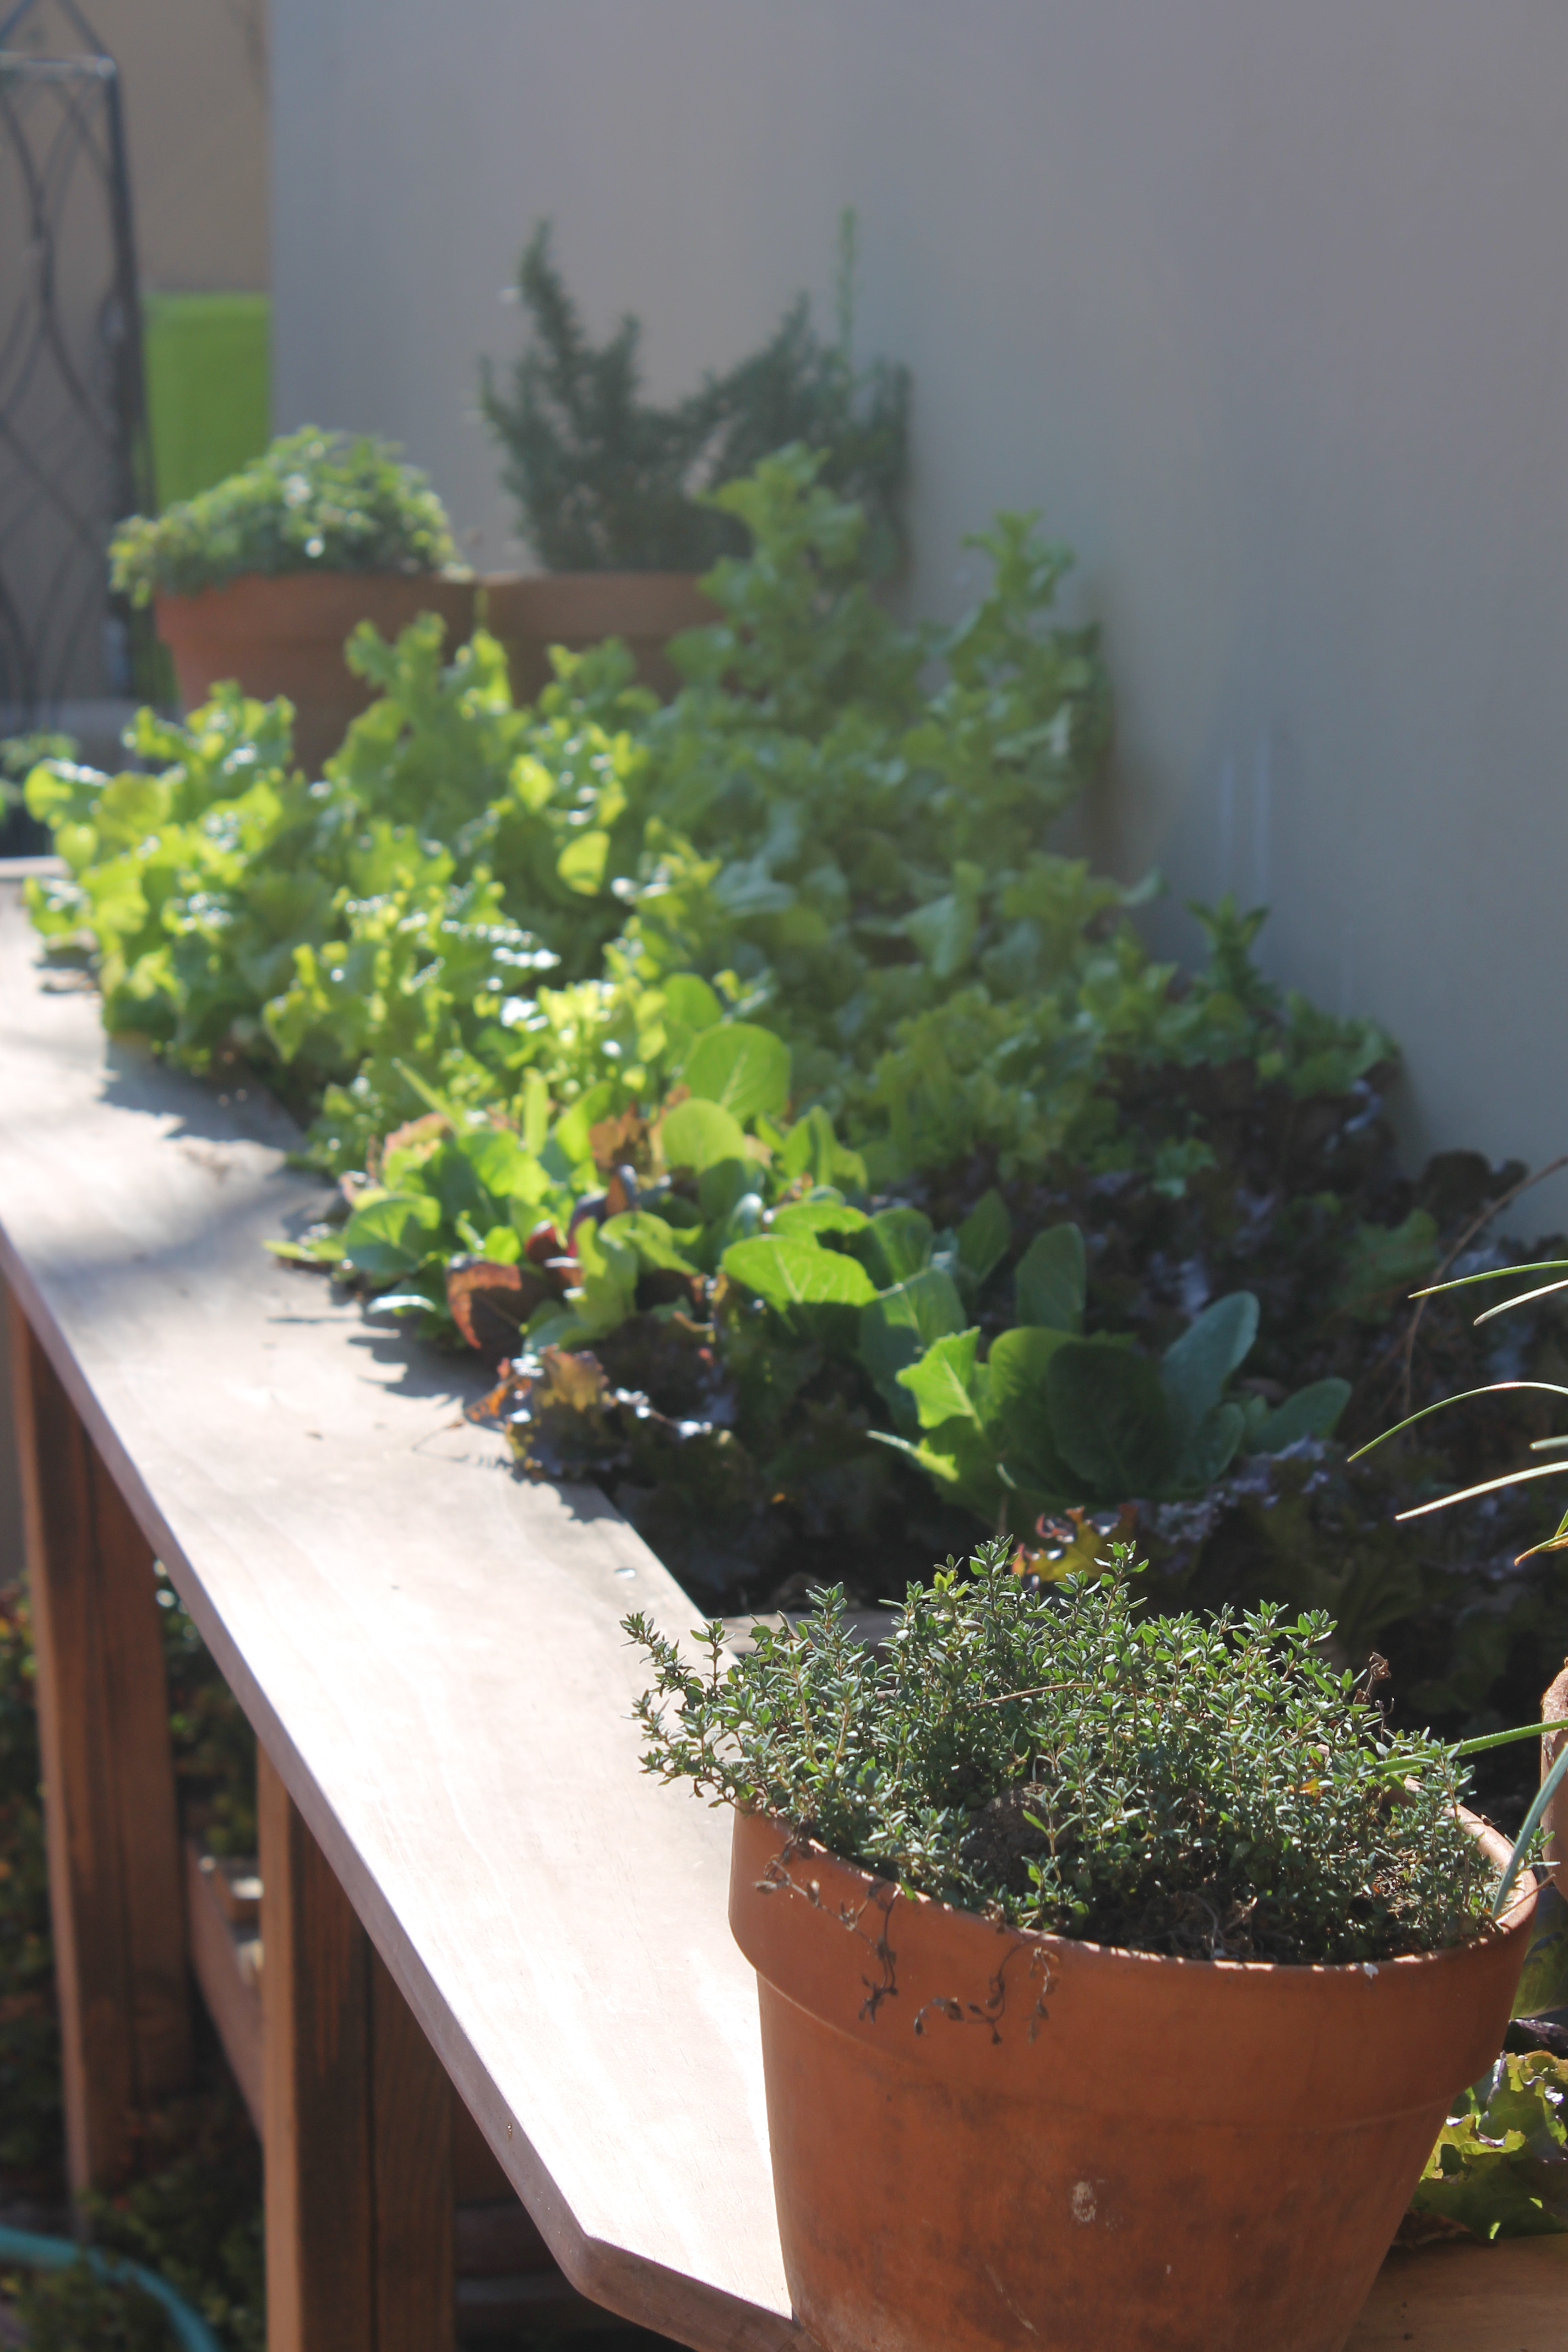
And now for some business! The delicious lettuce table  featured in yesterday’s post was an obvious hit. So my sweet hubby Peter volunteered to write up the instructions for building the table for anyone that is interested. I will however warn you that the supplies may shock you.

When I asked Peter to build me the table, he was super excited. Little did I know that the process would include not only the supplies to build the table, but it would also include a new top-of-the-line miter saw. A table to mount the saw to. Several new tools including a staple gun (the version we already owned was not right, allegedly), clamps, saw horses and a lot of other crap that I’m sure came home from Lowes but was not shown to me. That said, the result was fantastic – I’m just saying that you’ve been warned! The measurements below can be adjusted. Our table is pretty big, but could be made into a much smaller version for a deck or balcony.

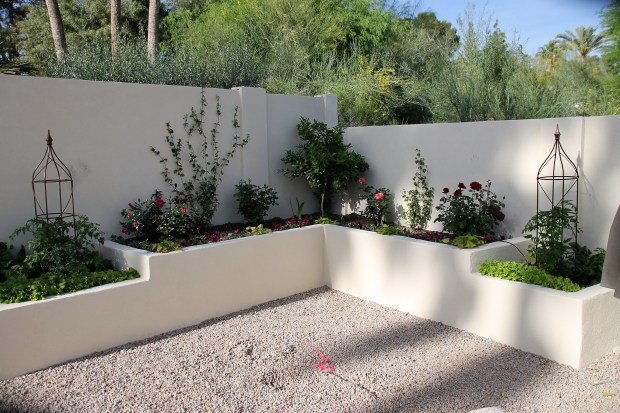
As far as planting, I found that loose leaf varieties of lettuce work great. Seedlings from the nursery didn’t do quite as well. Also spinach needs a little sandier and better draining soil. But the strawberries seem to be loving it so save a space for a few seedlings of berry goodness.

Supplies:

8 – 2”x4” boards (12’ long)

4 – 1”x4” boards (12’ long)

30 – 2 ½” Galvanized Deck Screws

24 – 1 ½” Galvanized Deck Screws

1- 2’ x 12’ Roll of Aluminum Window Screening

1- 2’ x 12’ Roll of Hardware Cloth

Mitre Saw (or a handsaw and some powerful biceps)

Staple Gun (with staples)

Drill (with bit to match screws)

Construction:

The first step in constructing your salad table is to cut your lumber into the following pieces (if you decided to us a hand saw, here is where you earn your keep):

2 – 2”x4”x12’ pieces

6 – 2”x4”x17” pieces

6 – 2”x4”x36” pieces

6 – 2”x4”x32” pieces

2 – 2”x4”x6’ pieces

2 – 1”x4”x12’ pieces

10 – 1”x4”x17” pieces

1.     Now that your lumber is cut, place your two 2”x4”x12’ pieces of lumber on the ground (parallel to each other) about 17” apart.

2.     Take two of your 2”x4”x17” pieces of lumber and place them between the 2”x4”s that are lying parallel on the ground so that you create a rectangle. Now use four of your 2 ½” galvanized deck screws to firmly secure the boards together.

3.     Take your four remaining 2”x4”x17” pieces of lumber and place them between the 2”x4”s that are lying parallel to create five relatively equal planting areas.  Now use eight of your 2 ½” galvanized deck screws to firmly secure the boards together.

4.     Now you get to use everybody’s favorite tool – the staple gun.  Roll out the hardware cloth and cover the bottom of your newly created rectangle with it.  Attach the hardware cloth with staples.

5.     Roll out the aluminum window screening and cover the bottom of your newly created rectangle (and the hardware cloth) with it.  Attach the aluminum window screening with staples.

6.     Now that the top of your salad table is complete, you need to construct legs for your table.  Because the top of your salad table is rather heavy you want stout legs that will bear all that weight.  To construct a table leg, take one of your 2”x4”x32” pieces and attach it to one of your 2”x4”x36” pieces with a 2 ½” galvanized deck screw.  You want the pieces to lay on top of each other on the 4” sides, meet at the bottom and leave a 4” gap at the top.  Repeat this process until you have six legs.

7.     With the rectangle still on the ground, you can now attach the legs to the top of your salad table with the 2 ½” galvanized deck screws – three legs on each side, one in the center, one three feet to the left and one three feet to the right.  The top of your salad table should rest on top of the 2”x4”x32” pieces and the 2”x4”x36” pieces should be on the outside of the table top.

8.     With the rectangle still on the ground, attach two 1”x4”x12’ pieces of lumber over the hardware cloth/aluminum screening with 1 ½” galvanized deck screws.  These pieces will give the table support and the table top won’t sag when you add soil.

9.     With the help of another person (or if you’re the tough guy who decided to use a handsaw you can do this yourself) turn the table over.  You can now attach the bottom shelf to your table.  To do so, attach the 2”x4”6’ pieces of lumber to the front and back the table legs about halfway between the ground and table top with the 2 ½” galvanized deck screws.  The 2”x4”x6’ pieces of lumber will not only provide a base for the shelf but will serve as a good brace for the table legs.

10. Now you can attach the ten 1”x4”x17” pieces of lumber to the 2”x4”x6’ pieces of lumber that you just added with the 1 ½” galvanized deck screws and create a slotted shelf – be aware that anything you put on this shelf will get wet when the table top drains.